
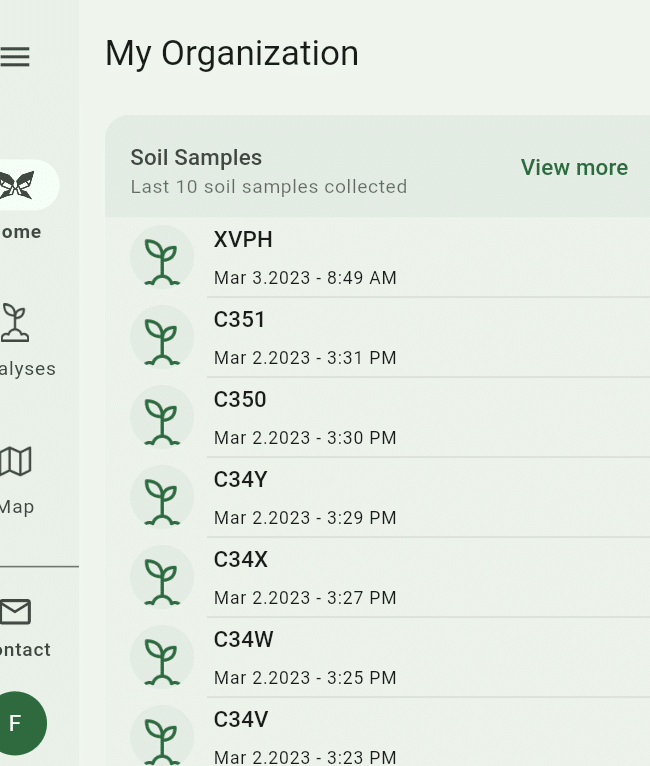
This allows the samples to be viewed by location on the app’s map.

We recommend that you charge the probe after each day in the field (can last up 2-3 days of sampling).
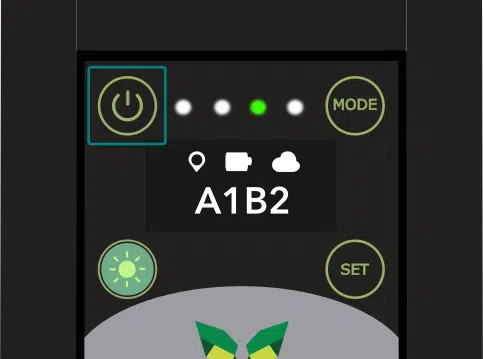
This allows communication between the probe and the application.

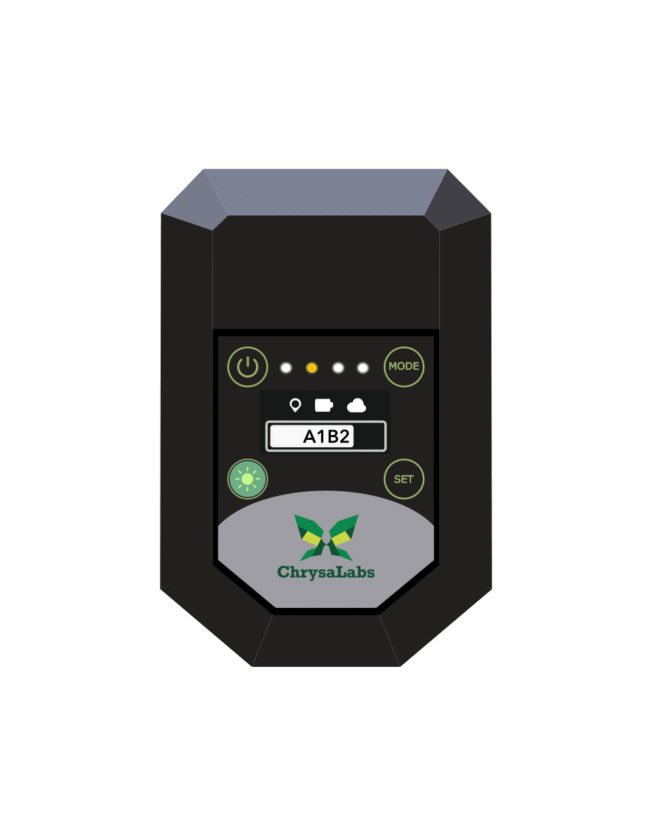
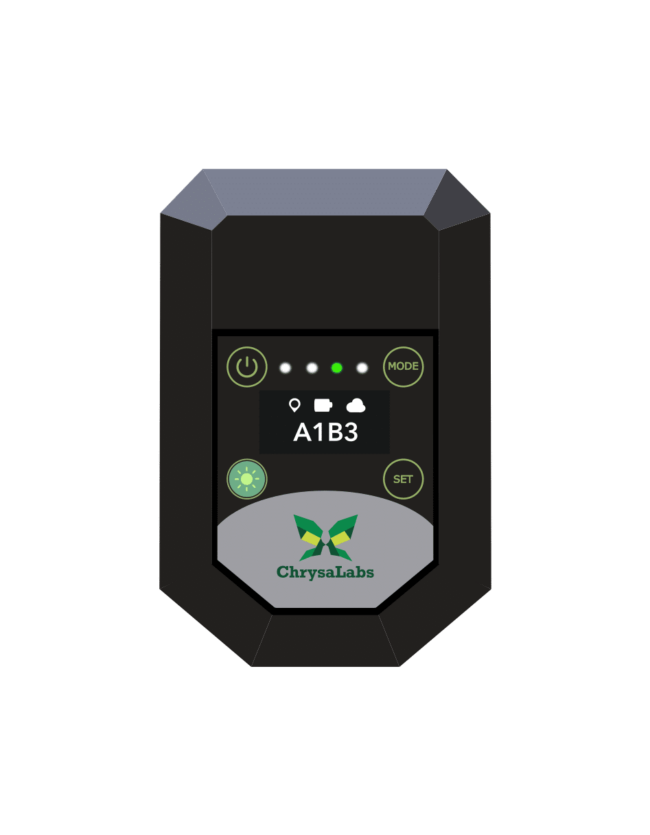
The sample tag displayed on the screen indicates that the probe is ready to collect a measurement.
Long press this button to cancel a measurement before it is finished.
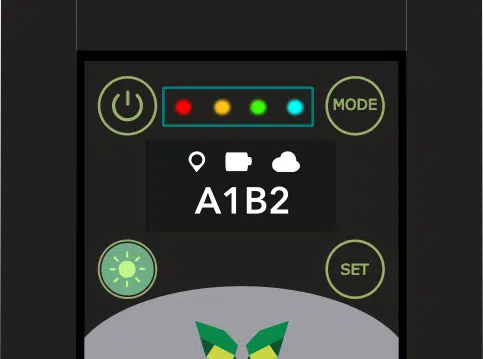
All - probe starting up Red - error Yellow flash - measurement in progress Green flash - searching for GPS signal Green steady - ready for measurement Blue - battery charging
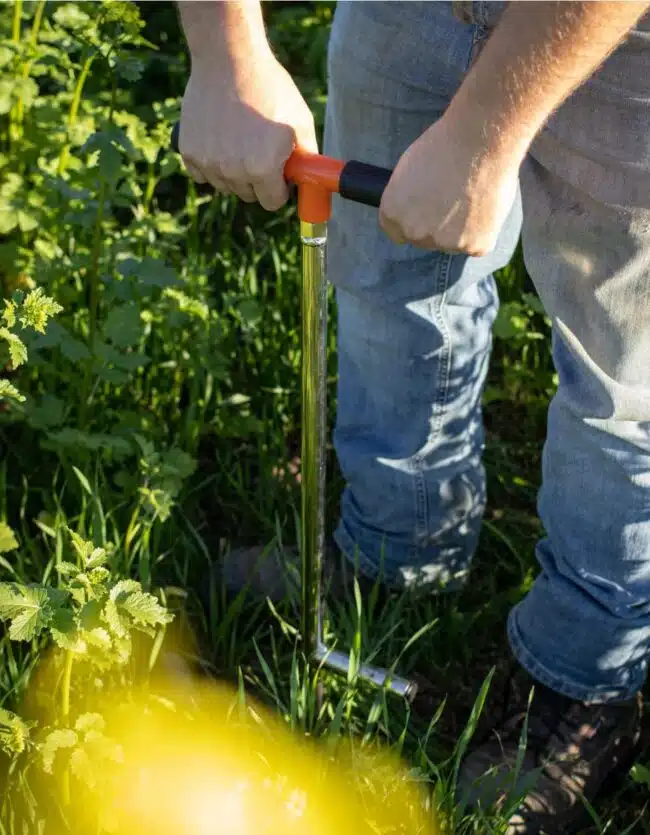
Create a pre-hole in the soil using the manual auger provided or another suitable tool. Insert the probe into the pre-hole and ensure that it is steady.
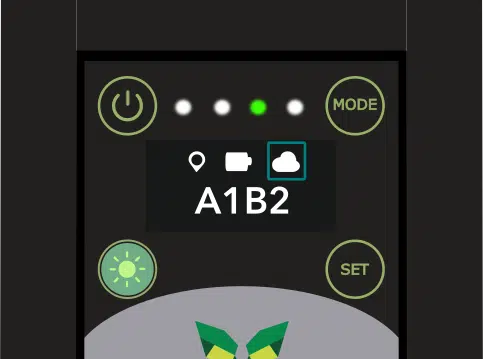
To begin collecting a measurement, press the green button. The probe will display a progress bar during collection, and the process will take about 25 seconds.
Once the measurement is completed, a new sample tag will be displayed on the screen, indicating that the probe is ready for the next sample. If the probe is connected to the cloud, a dynamic arrow will show that data is being transferred from the probe to the cloud.
Once this happens, the sample data will be visible on the ChrysaLabs app. If you do not have cloud connection in the field, the data will be stored in the probe and uploaded automatically once connection is restored.
Before inserting the probe in a new hole, wipe off any excess soil using the provided microfiber cloth or another non-abrasive fabric. For soils with high clay content, it may be necessary to wipe the probe with a wet cloth between measurements.
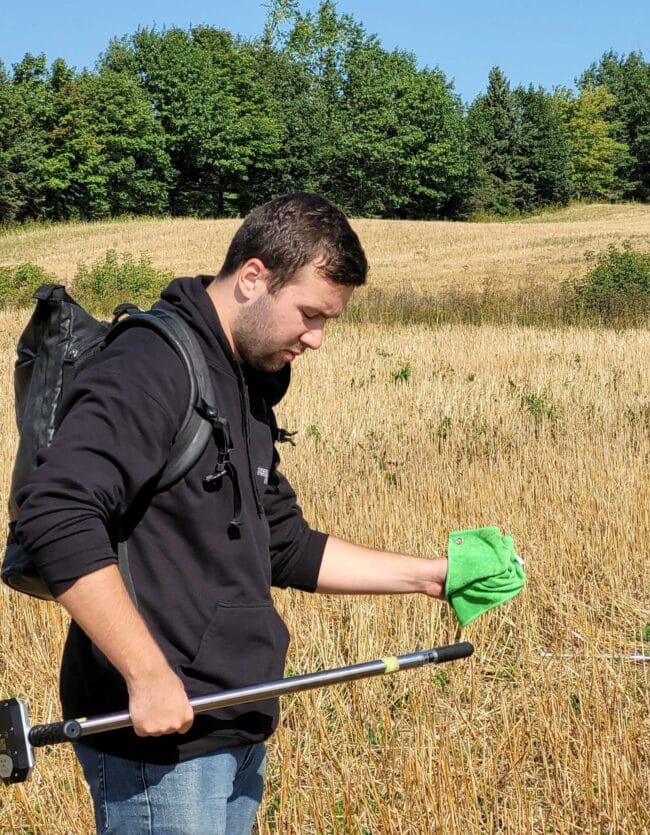
Create a pre-hole in the soil using the manual auger provided or another suitable tool. Insert the probe into the pre-hole and ensure that it is steady.
To begin collecting a measurement, press the green button. The probe will display a progress bar during collection, and the process will take about 25 seconds.
Once the measurement is completed, a new sample tag will be displayed on the screen, indicating that the probe is ready for the next sample. If the probe is connected to the cloud, a dynamic arrow will show that data is being transferred from the probe to the cloud.
Once this happens, the sample data will be visible on the ChrysaLabs app. If you do not have cloud connection in the field, the data will be stored in the probe and uploaded automatically once connection is restored.
Before inserting the probe in a new hole, wipe off any excess soil using the provided microfiber cloth or another non-abrasive fabric. For soils with high clay content, it may be necessary to wipe the probe with a wet cloth between measurements.
There are two ways to create composites when using the ChrysaLabs probe. The first is to use Composite Mode, which allows you to create composites on the probe directly while you’re in the field.
By default, the probe is set to single sample collection mode. The ‘Mode’ and ‘Set’ buttons are used to access Composite Mode. Long press the ‘Mode’ button to access the menu, and use the ‘Set’ button to toggle options on and off.
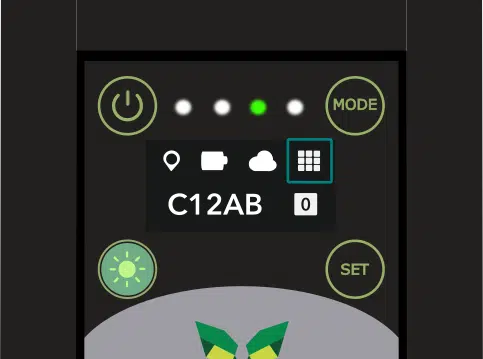
The 3x3 square icon indicates that Composite Mode is enabled. The white square indicates the number of samples you have collected as part of the current composite. A composite can consist of as many individual samples as you wish.
You will still use the green button to start collecting a measurement. Once you have collected the desired numbers of samples for the composite and wish to move onto the next one, select the SET button to start a new composite. The composite tag should change, and the sample count should reset to 0.
If you have any questions or issues when using the probe, we are here to help! Please contact our team at support@chrysalabs.com or +1 833-522-7645.